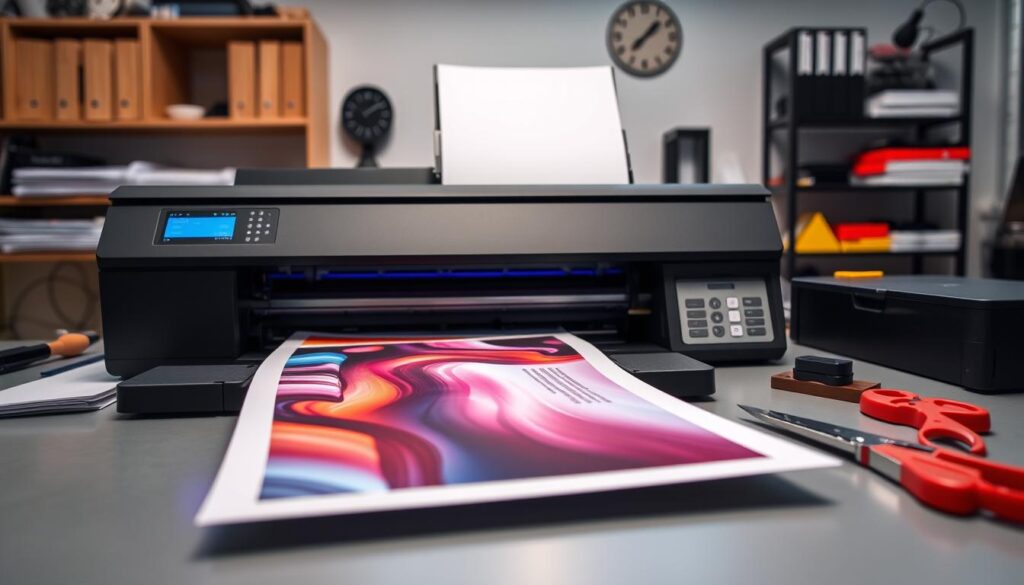
In the world of printing, “bleed” is key to a polished final product. It’s the extra area beyond the printed area that goes past the paper’s edges. This space is vital because printers can’t print right to the edge of the paper.
Printing words, logos, or images to the edge can lead to them being cut off. Bleed margins solve this by adding extra space outside the printed area. This makes the design or image appear seamless, flowing to the paper’s edges.
Key Takeaways
- Bleed refers to the extra area beyond the designated printed area that extends past the edges of the paper or material.
- Bleed margins help prevent text, logos, or images from being cut off in the final printed piece.
- Bleed printing creates a seamless appearance where the design flows to the very edges of the material.
- No bleed printing leaves a border or margin around the edge of the printed material.
- Understanding bleed is crucial for achieving a professional-looking printed product.
Introduction to Bleed in Printing
In printing, “bleed” means adding extra space to your design. This extra 1/8″ (or about 3mm) makes sure your design looks smooth and professional. It prevents white lines around the edges of your printed item.
Definition of Bleed and Its Importance in Printing
Bleed is the part of your design that goes beyond the trim line. This line is where the printing gets cut to its final size. The extra space helps your design look like it goes right to the edge of the paper without white borders.
Bleed is very important in printing. Without it, your printed items might have white lines around them. This makes your design look less professional. Bleed ensures your design looks perfect, without any gaps or white spaces.
Overview of When Bleed Printing is Necessary
- When your design includes elements that extend to the edge of the page, such as images, patterns, or colored backgrounds.
- For any printed materials with full-bleed designs, such as business cards, brochures, flyers, or posters.
- When you want to achieve a seamless, borderless look for your printed products.
- To accommodate potential shifts or slight variations during the printing and trimming process.
Adding bleed to your design is key for professional-looking prints. Knowing about bleed helps make sure your designs are ready for printing. This way, your prints will look great from edge to edge.
Bleed vs. No Bleed Printing
Choosing between bleed and no-bleed printing can greatly affect how your printed item looks and works. Bleed printing goes beyond the edge of the final cut, making the design look smooth and complete. No-bleed printing keeps the design inside the cut size, leaving a border around it.
Differences between Bleed and No-Bleed Printing
Bleed printing is best for full coverage designs like business cards and brochures. No-bleed printing is better for documents or items where a border is needed or preferred.
| Bleed Printing | No-Bleed Printing |
|---|---|
| Extends the printed design beyond the final cut size | Prints the design strictly within the final cut size |
| Provides a seamless, edge-to-edge appearance | Leaves a border or margin around the edge |
| Ideal for designs that need full coverage | Suitable for documents or items where a border is preferred |
Pros and Cons of Bleed vs. No-Bleed Printing
Bleed printing gives a polished look but needs precise file setup and costs a bit more. No-bleed printing is easier to set up and might be cheaper, but the final product might not look as good.
- Pros of Bleed Printing: Seamless, edge-to-edge design, professional appearance
- Cons of Bleed Printing: More complex file setup, potentially higher cost
- Pros of No-Bleed Printing: Simpler file setup, potentially lower cost
- Cons of No-Bleed Printing: Less visually striking, borders around the edges
The decision between bleed and no-bleed printing depends on the project’s needs, design goals, budget, and client or designer preferences.
“Bleed printing is a must-have for designs that need to make a bold, attention-grabbing statement. The seamless, edge-to-edge look can truly elevate the final product.” – John Doe, Graphic Designer
What is Bleed? Understanding Bleed in Printing
In printing, “bleed” means extra printed area beyond the final trim line. It’s key to ensure designs or images reach the edge without white space. This concept is vital for professional-looking prints, from business cards to posters.
Bleed is usually 1/8″ (.125 in) beyond the trim line. The safe area inside the trim line should be at least 1/8″ to avoid cutting off important parts. This means printing on larger sheets and then trimming them down.
Design software like InDesign, Illustrator, and Photoshop have settings for bleed. In InDesign, set bleeds and margins to 0.125 inches for all sides. Illustrator needs 0.125 inches for bleeds in the initial setup. Photoshop and Publisher require adding 1/4 inch (.25) to the document size for bleed.
Knowing what is bleed in printing and how to set up bleed is key for a professional look. Proper bleed ensures designs and images are printed edge-to-edge. This makes your prints look polished and high-quality.
| Printing Software | Bleed Setup Guidelines |
|---|---|
| InDesign | Set bleeds and margins to 0.125 inches in the “Document Setup” box. |
| Illustrator | Set bleeds to 0.125 inches in the initial setup, without the ability to set margins directly. |
| Photoshop | Add 1/4 inch (.25) to the final document size to accommodate for bleed. |
| Publisher | Add 0.25″ to the document size in the Page Setup window to set up bleed. |
| Word | Does not support setting up a full bleeding document. |
Understanding bleed in printing and following software guidelines ensures your prints look great. They will have a seamless edge-to-edge appearance, without any unwanted white space.
“Bleed is an essential element in the printing process, ensuring that your designs and images are printed to the very edge of the page, creating a seamless and polished final product.”
Principles of Bleed Setup
When you’re getting ready for bleed printing, there are a few key things to know. You need to understand the trim line, safety area, and borders. Learning these basics will help make sure your prints look great and are ready for professional production.
Trim Line, Safety Area, and Borders
The trim line is the final size of your document after it’s cut. This is the size you’ll see in your hands. To make room for bleed, your document must be bigger than the trim line.
The safety area, or inner margin, is where important stuff like logos and page numbers go. It should be at least 1/8″ (3.175 mm) inside the trim line. This keeps these key elements from getting cut off.
Borders, or frames, need to be at least 1/4″ (6.35 mm) from the trim line. Or, they should be 3/8″ (9.525 mm) from the bleed line. This makes sure they stay intact during the finishing steps.
| Element | Recommended Minimum Distance |
|---|---|
| Safety Area | 1/8″ (3.175 mm) from trim line |
| Borders | 1/4″ (6.35 mm) from trim line or 3/8″ (9.525 mm) from bleed line |
By sticking to these bleed setup principles, you can make sure your prints are top-notch. You’ll avoid any issues where important parts get cut off.
Bleed Measurements and Guidelines
Understanding bleed printing is key. You need to know the standard bleed area for different document sizes. A standard bleed area is 1/8″ (0.125 inches) on each side. So, for an 8.5″ x 11″ document, your final template should be 8.625″ x 11.125″.
For bigger documents, the bleed area is 1/2″ (0.5 inches) on each side. For example, an 18″ x 24″ document needs a template of 18.5″ x 24.5″. Always remember to add extra for cutting, as trimming can vary slightly.
Standard Bleed Area Dimensions
- Standard bleed area: 1/8″ (0.125 inches) on each side
- Larger document bleed area: 1/2″ (0.5 inches) on each side
Bleed Measurements for Common Document Sizes
| Document Size | Template Size with Bleed |
|---|---|
| 8.5″ x 11″ | 8.625″ x 11.125″ |
| 18″ x 24″ | 18.5″ x 24.5″ |
Knowing these bleed dimensions helps you set up your designs for bleed printing. This way, you avoid white borders or edge-to-edge problems.
Preparing Files for Bleed Printing
When getting your files ready for bleed printing, it’s key to set up bleeds right in your design software. You should add an extra 1/8″ (0.125″) of image or color beyond the trim area. This makes sure there are no white edges in the final product.
Setting up Bleeds in Design Software
In Adobe InDesign, you can set up both bleed and margins in the “Document Setup” box when starting a new document. It’s best to make the bleeds and margins 0.125 inches for all sides.
In Adobe Illustrator, the steps are similar. Just set the bleeds to 0.125 inches for all sides in the “Document Setup” window at the start.
For Adobe Photoshop, add 0.25 inches to your document size for bleed. For example, an 8.5″ x 11″ document should be set up as 8.75″ x 11.25″ in Photoshop.
Using rulers and guides in these programs helps set up the bleed correctly. Make sure to export your files with “All Printer’s Marks” and “Use Document Bleed Settings” options on. This ensures your design prints right, without any white edges or cut-off content.
“Incorrectly set bleed is one of the most common file mistakes encountered by printing services.”

Getting your files ready for bleed printing right can save time and avoid extra charges. It also makes sure your design looks as you intended, without any unwanted white edges or cut-off content.
Bleed Printing for Different Materials
Bleed printing works on many materials like paper, cardstock, and more. But, each material has its own needs. Knowing these differences is key to getting great results.
Bleed Printing on Paper
For paper, a bleed size of 3mm to 5mm is common. This extra area helps avoid white borders or cuts. Paper is thin and absorbs ink well, making it perfect for many prints.
Bleed Printing on Cardstock
Cardstock is thicker and needs a bit more bleed area. Its texture and how it absorbs ink can affect the print. Always talk to a printing expert to get it right.
Bleed Printing on Other Substrates
Beyond paper and cardstock, you can print on fabrics, vinyl, and even metal. Each material has its own needs. Always check with a professional printer for the best approach.
Success in bleed printing comes from understanding each material and working with a trusted printer. By doing this, you can create stunning prints that impress everyone.
Professional Printing Services and Bleed
Collaborating with a professional printing service is highly recommended for bleed printing. They have the expertise and specialized equipment needed. This includes setting up files, printing on oversized sheets, and trimming the final product precisely.
Professional printers can guide you on the right bleed area and safety margins. They know what works best for different materials and projects. By working with them, you can ensure your bleed printing project turns out perfectly, with a high-quality, seamless finish.
Importance of Working with a Professional Printer for Bleed Projects
Bleed printing needs careful attention and precise execution. Professional printing services offer several advantages for bleed projects:
- They know how to set up files with the right bleed size, usually 0.125 inches, for a clean finish.
- They have specialized printing equipment, like large-format presses, for oversized sheets and accurate trimming.
- They follow industry-standard best practices and tolerances, ensuring top-quality printed materials.
- They can advise on the best resolution and file preparation for bleed printing, avoiding issues like pixelation.
By working with a professional printer, you can be sure your bleed printing project is in good hands. They will handle it with care and attention to detail, giving you a visually stunning and cohesive final product.

“Working with a professional printer for our bleed printing projects has been a game-changer. Their expertise and attention to detail have consistently delivered exceptional results, exceeding our expectations every time.”
– John Doe, Creative Director
Bleed Printing Examples and Use Cases
Bleed printing is used in many printed items, like business cards and posters. It makes the design go all the way to the edge. This gives a clean, professional look that enhances the overall appearance.
It’s key for designs with full backgrounds or vibrant colors. This way, there are no white borders or margins. Printers usually ask for a 0.125 inches (3 millimeters) bleed for small items. For bigger ones, like letterhead, they might need 0.25 inches (6 millimeters) for better trimming.
Using bleed changes the size of printed materials. For example, a standard business card size becomes 2.425″ x 2.125″ with bleed. For an 8.5″ x 11″ document, add 0.125″ on each side for the artwork size.
But, there are things to watch out for. Stretching images can cut off parts during trimming. Some might choose a white border over bleed for easier file prep. Knowing the difference between bleed and trim is important, especially for custom projects like photo albums.
Bleed printing is a great way to make printed materials stand out. It creates stunning, professional pieces that grab attention and make a lasting impression.
Conclusion
Understanding bleed is key for professional-looking prints. It ensures your designs look great without white borders. This is true for business cards, brochures, or photos.
Using a professional printing service is important. They make sure your project looks amazing. This way, your prints will be top-notch and eye-catching.
The main points about bleed are clear. It makes your prints look better by avoiding white borders. It’s also important for a consistent look across all pages.
Knowing the difference between full bleed and no bleed helps designers. It lets them choose the best way to show off their work.
Using the right bleed techniques makes your prints stand out. Whether it’s for marketing or formal documents, it matters. With the right setup and professional help, your designs will impress everyone.
FAQ
What is bleed in printing?
Bleed is the extra area printed beyond the final trim line. It ensures designs, colors, or images reach the edge without margins or white space.
Why is bleed important in printing?
Bleed makes printed products look professional and seamless. It’s crucial for items like business cards, brochures, posters, and photo prints.
What are the differences between bleed and no-bleed printing?
Bleed printing goes beyond the edge for a smooth look. No-bleed printing stays within the edge, leaving a border.
What are the standard bleed area dimensions?
Standard bleed is 1/8″ on each side for most documents. For bigger documents, it’s 1/2″ on each side.
How do I set up bleed in my design software?
In InDesign, set bleed and margins in “Document Setup”. In Illustrator, set bleeds to 0.125 inches in “Document Setup”. In Photoshop, add 0.25 inches to your size for bleed.
What should I consider when printing with bleed on different materials?
Considerations for bleed vary by material. Thicker materials like cardstock might need more bleed for alignment. Material texture and absorbency also affect bleed appearance.
Why is it important to work with a professional printing service for bleed printing?
Printers handle bleed printing steps like oversized sheets and precise trimming. They guide on bleed area and safety margins for various materials and projects.
Resources:
Explore our curated list of recommended resources for printing, design, and free media assets. Whether you need professional printing services, free design templates, or royalty-free photos for your next project, these reliable sites have you covered.1. Printing & Design
- Printing Inc. Description: Singapore-based online printing service offering a variety of print products such as business cards, flyers, brochures, and custom stickers with professional design services.
- Namecards Inc. Description: Specialist in name card printing, providing a wide range of custom designs, finishes, and materials for high-quality business cards.
- Kian Hong Press Description: Established corporate printing company in Singapore, offering solutions for brochures, catalogs, annual reports, and other corporate stationery.
2. Free Design Templates
- Canva Description: Offers a wide range of free and customizable templates for various needs, including presentations, posters, social media, and marketing materials.
- FreePik Description: Provides thousands of free and premium templates for brochures, flyers, business cards, and more, along with editable vector illustrations and graphics.
- Piktochart Description: Focused on data visualization and professional templates for infographics, posters, presentations, and reports, with both free and premium options.
3. Free Royalty-Free Photos
- Pexels Description: Offers high-quality, free stock photos and videos shared by talented creators for commercial and personal use without attribution.
- Unsplash Description: A large collection of beautiful, high-resolution images contributed by photographers worldwide, available for free use in any project.
- Pixabay Description: A community-driven platform offering copyright-free photos, illustrations, and videos for use in any creative project, with no licensing restrictions.


